
How to Set Up Roles and Permissions in PawnCRM
PawnCRM’s Roles and Permissions system gives you granular control over who can access what in your CRM. Create custom roles, assign specific permissions per module, and ensure every team member has exactly the access they need. Whether you’re managing a small team or a large organization, role-based access control keeps your data secure and your workflows organized.
Roles Overview
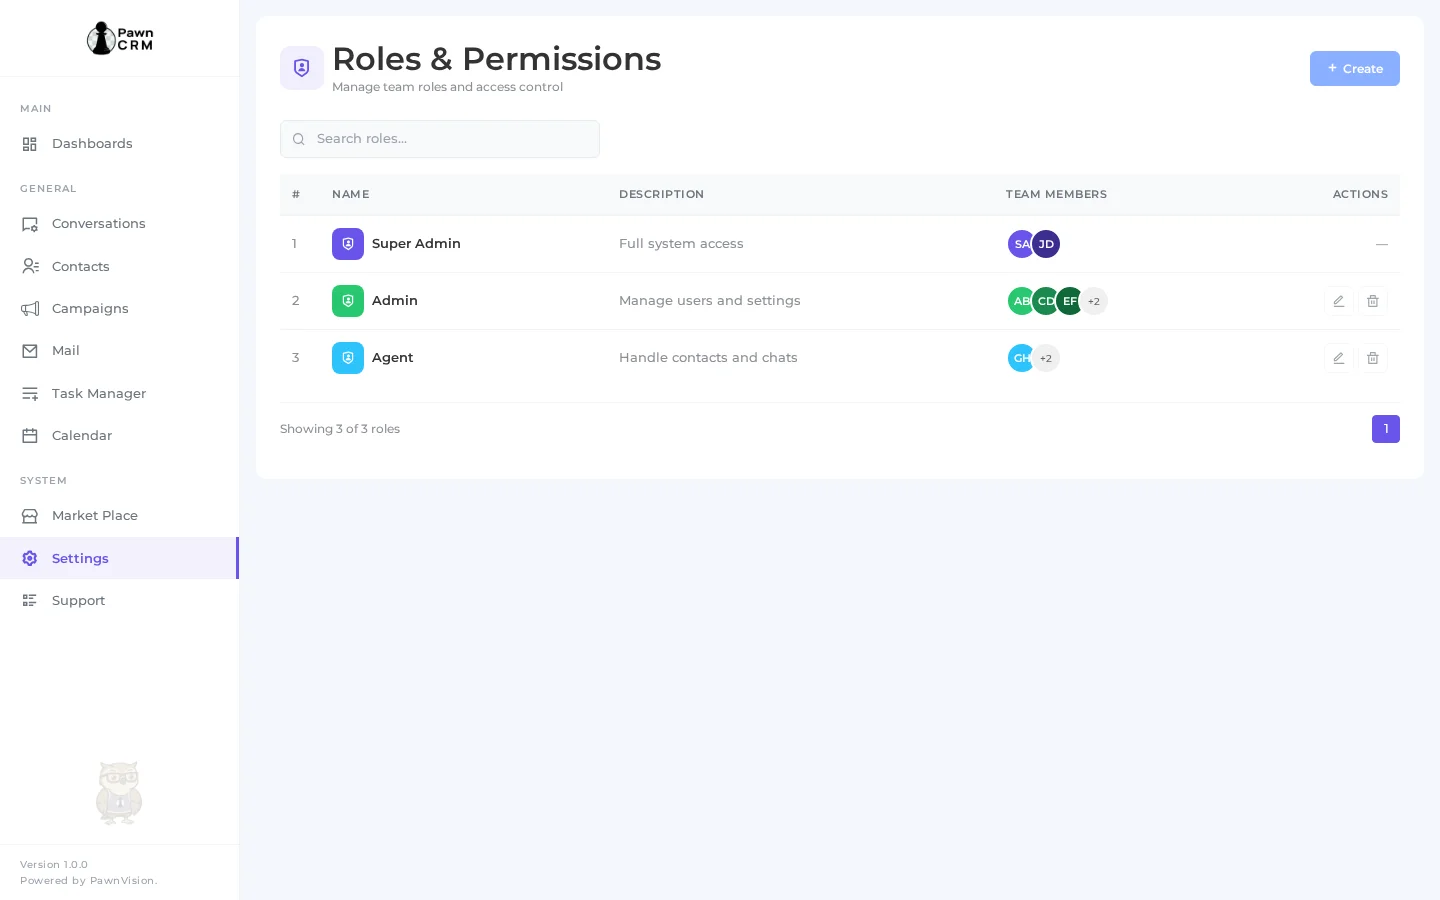
The Roles page lists all roles in your organization with a clean, searchable table. Each row shows the role name with a colored shield badge, a description of the role’s purpose, and the team members assigned to it displayed as avatar circles. The Actions column provides edit and delete buttons for managing each role. The Super Admin role is protected and cannot be modified or deleted, ensuring there’s always a full-access administrator.
Creating a New Role
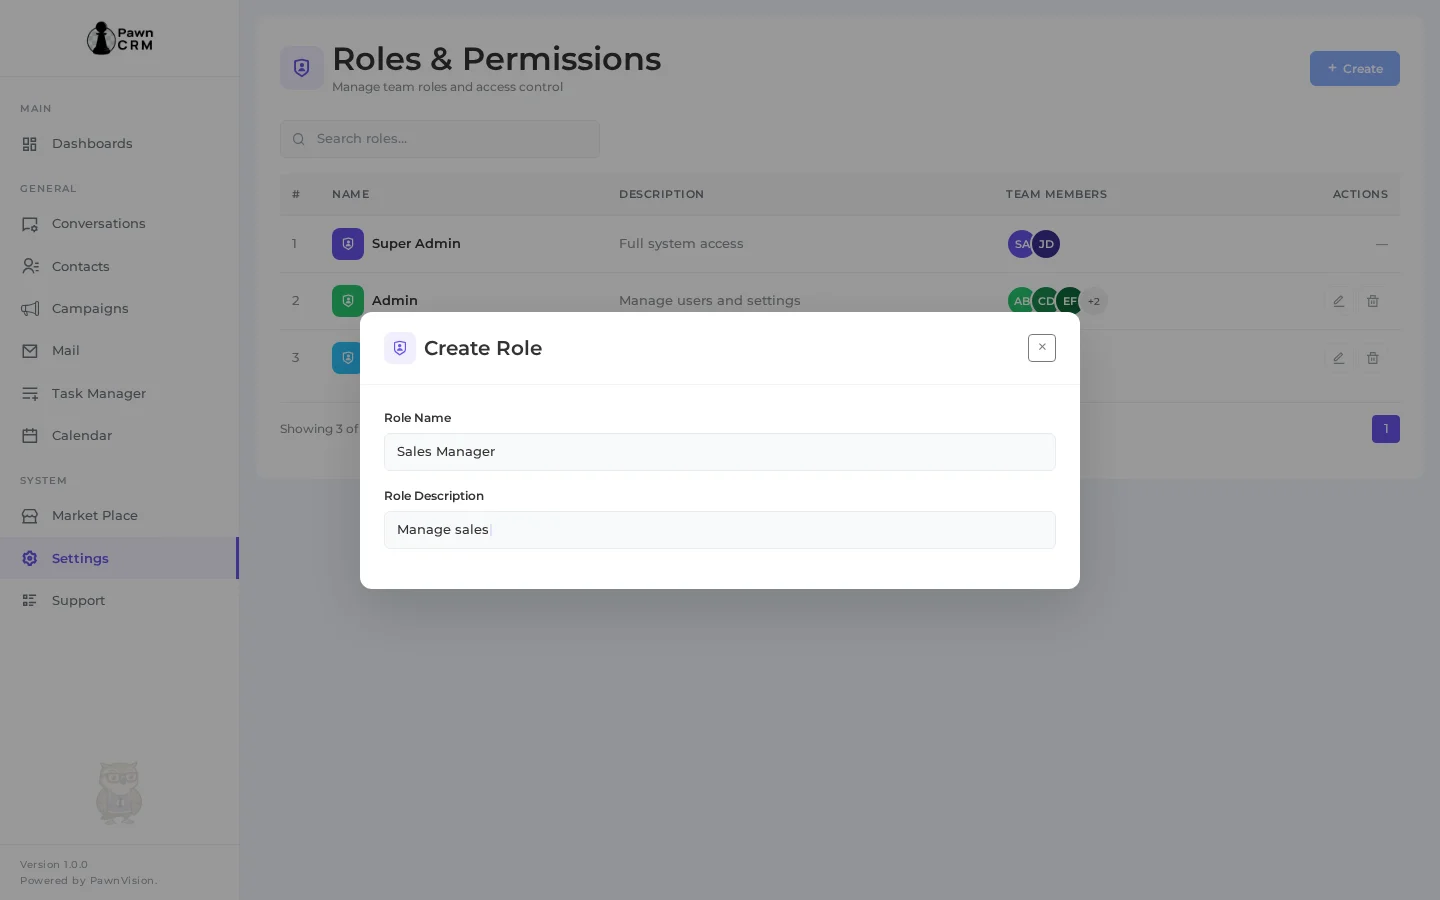
Click the “+ Create” button to open the Create Role modal. Enter a descriptive role name and a brief description of what the role is responsible for. The modal overlays the roles table so you can see your existing roles while creating a new one. PawnCRM validates that both fields are filled before allowing you to proceed to permission assignment.
Assigning Permissions
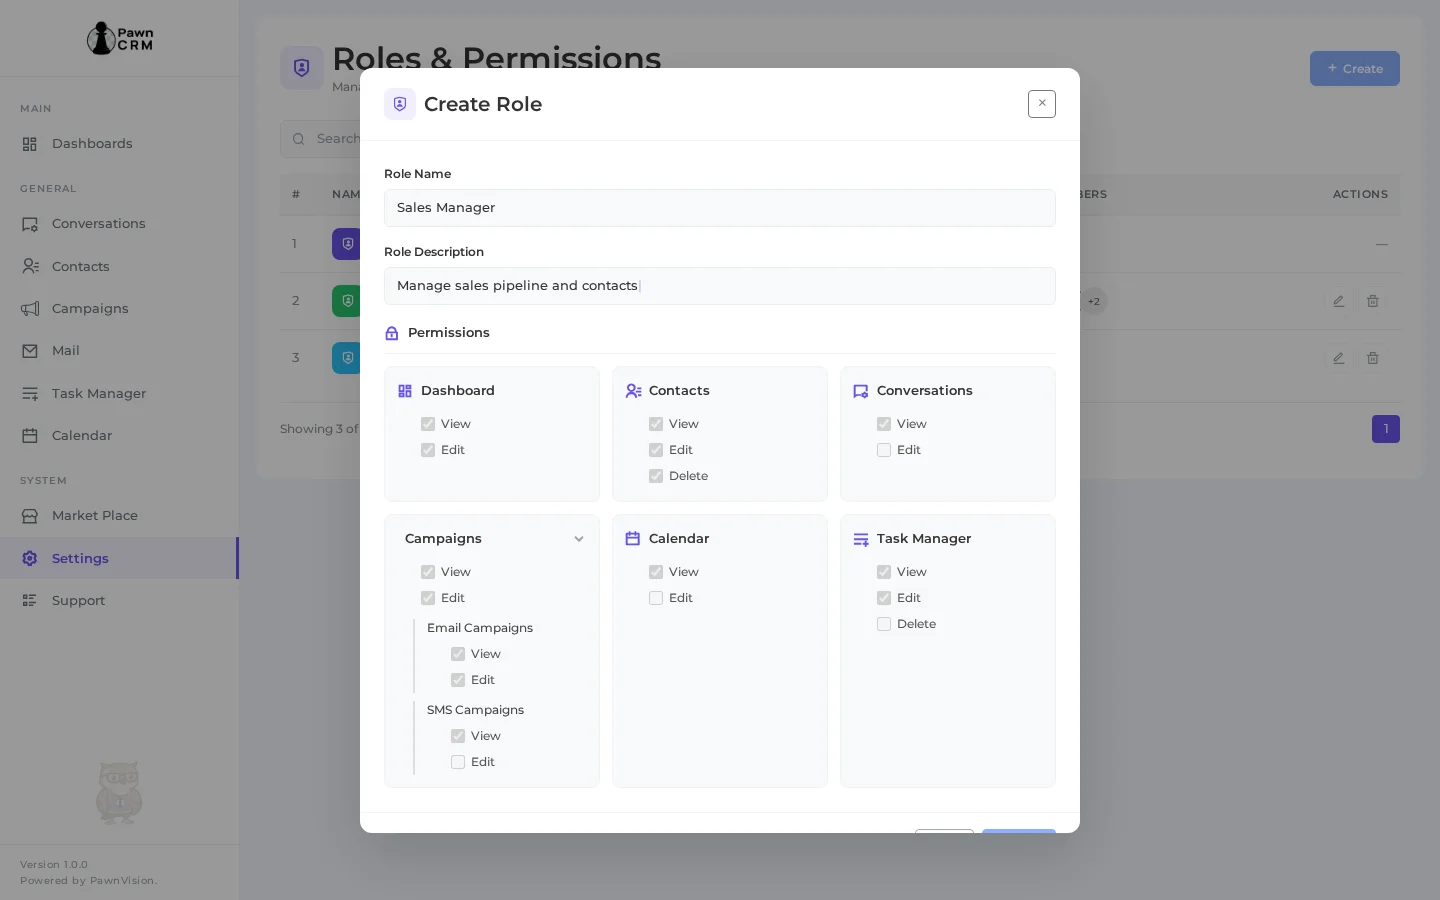
The Permissions grid is where you define exactly what each role can do. Permissions are organized by module in a clean three-column layout: Dashboard, Contacts, Conversations, Campaigns, Calendar, and Task Manager. Each module shows its available actions as checkboxes — View, Edit, and Delete. Nested modules like Campaigns expand to reveal sub-modules (Email Campaigns and SMS Campaigns) with their own individual permissions. Check the permissions you want to grant, and the role will only have access to those specific features and actions.
Editing an Existing Role
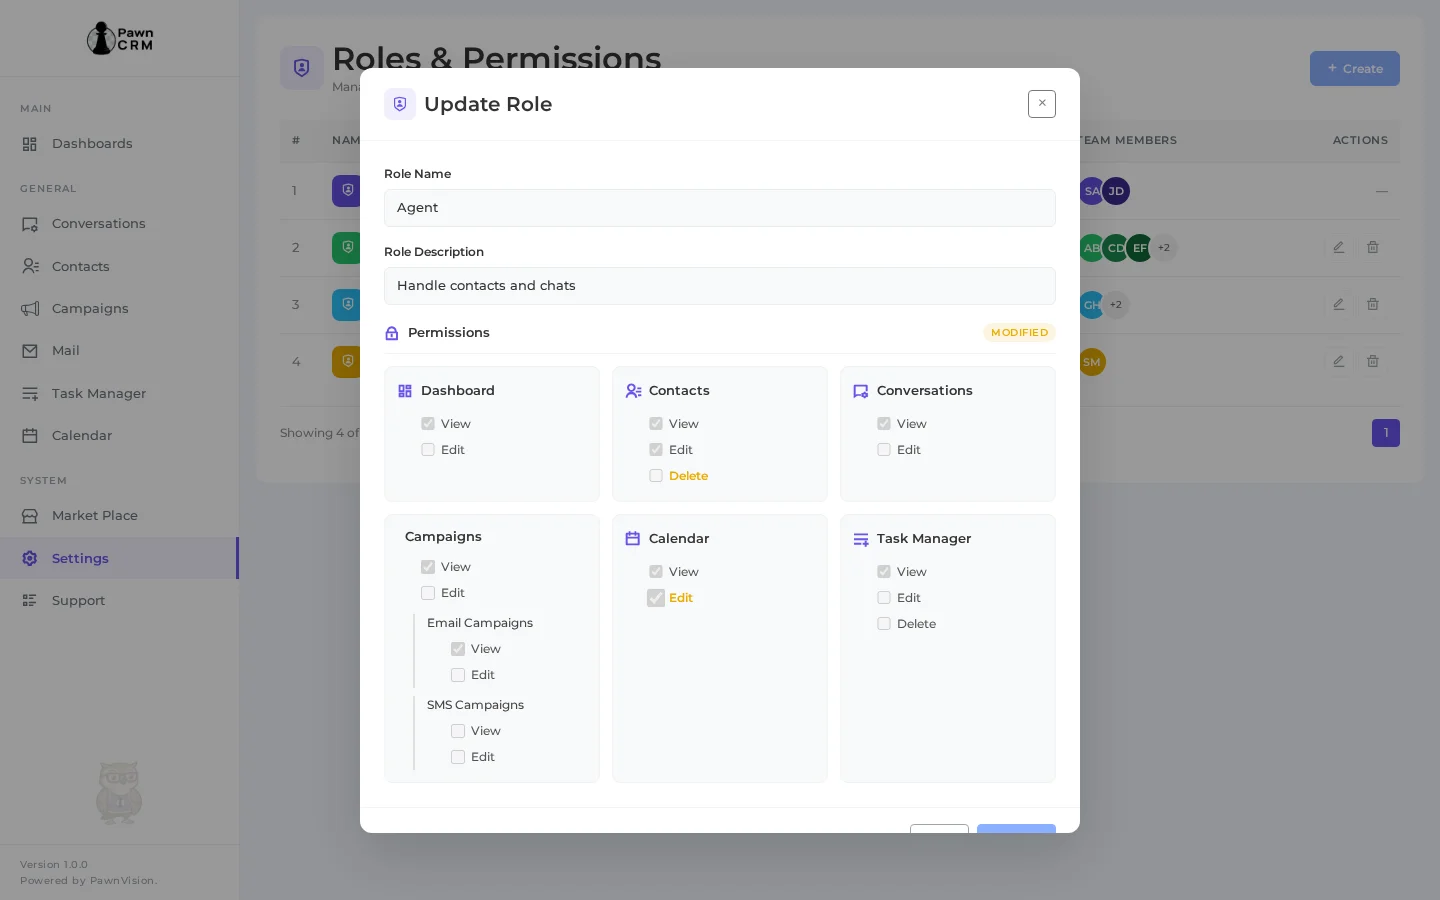
To modify an existing role, click the edit icon in the Actions column. The Update Role modal opens with the role’s current name, description, and permission settings pre-filled. Toggle permissions on or off as needed — changed permissions are highlighted so you can easily see what’s been modified. The “Modified” badge appears next to the Permissions header to indicate unsaved changes. Click Update to save your changes.
Confirmation and Updated Roles
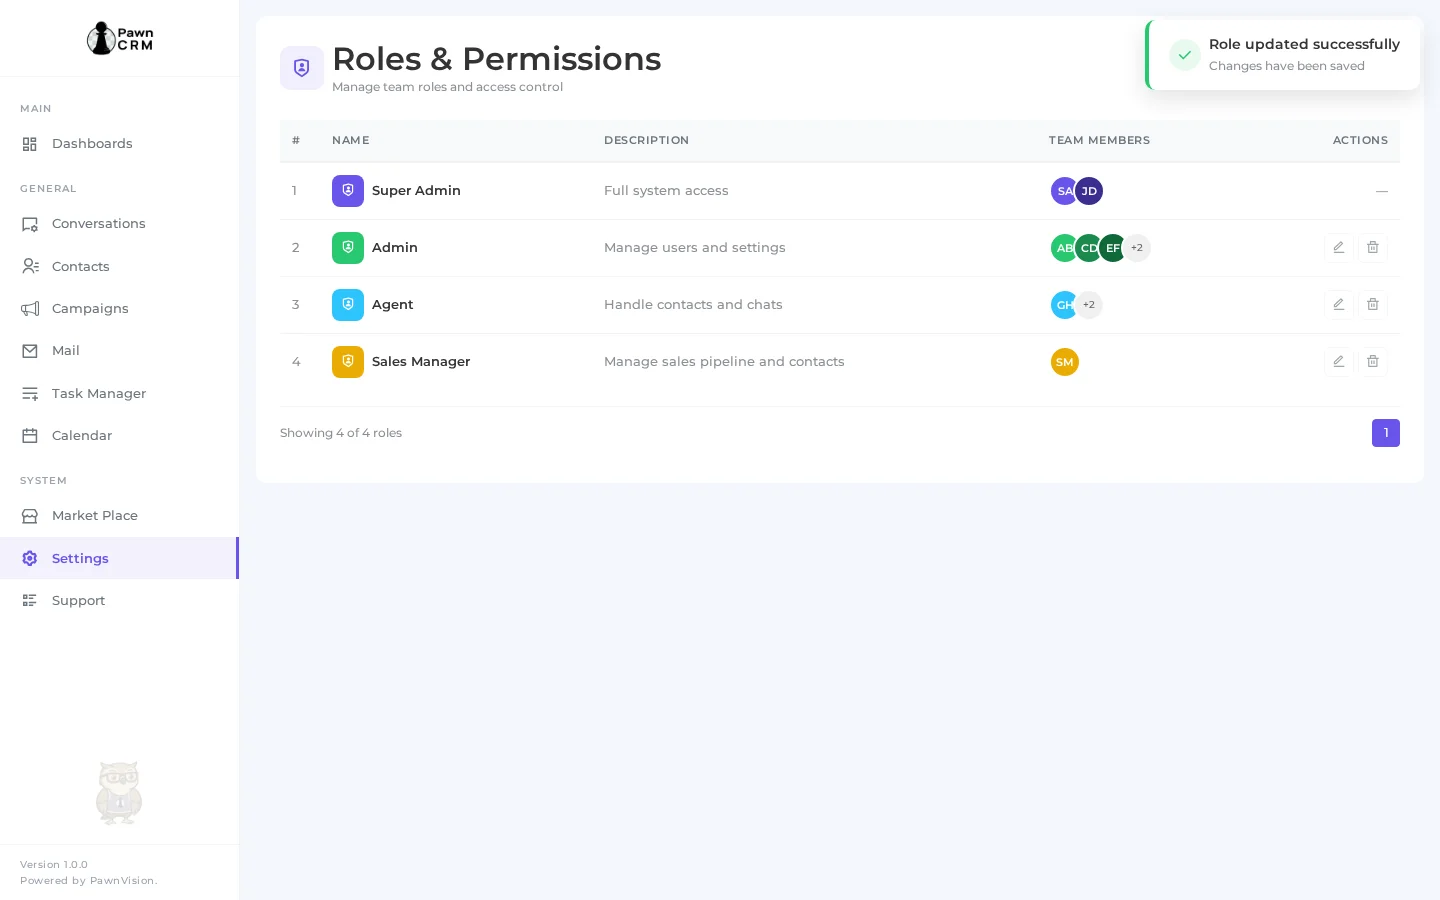
After creating or updating a role, a success notification confirms your changes have been saved. The roles table refreshes to show the updated list. New roles appear immediately in the table with their assigned team member count. The entire workflow — from creating a role to assigning permissions — takes just a few clicks, making it easy to onboard new team members with the right access from day one.

PawnCRM’s role-based access control ensures your team works efficiently without compromising security. Create roles that match your organizational structure, assign granular permissions by module, and update access as responsibilities evolve. Start setting up your team’s roles today to keep your CRM secure and organized.
Related Articles
Continue exploring PawnCRM with these guides: